If you're in the custom apparel world, you've likely heard the term "DTF" buzzing around. Direct-to-Film transfers have quickly become a favorite for everyone from Etsy sellers to established brands, celebrated for their vibrant colors, incredible detail, and versatility. But what exactly is a DTF transfer, and how does this technology turn a digital design into a durable, wearable print?
Understanding the DTF process is key to unlocking its full potential for your business. It's a multi-step method that combines digital printing precision with a powerful adhesive to create graphics that work on a huge range of fabrics. This guide breaks down the entire process, from creating your file to the final heat press, so you can see how simple and effective it truly is.
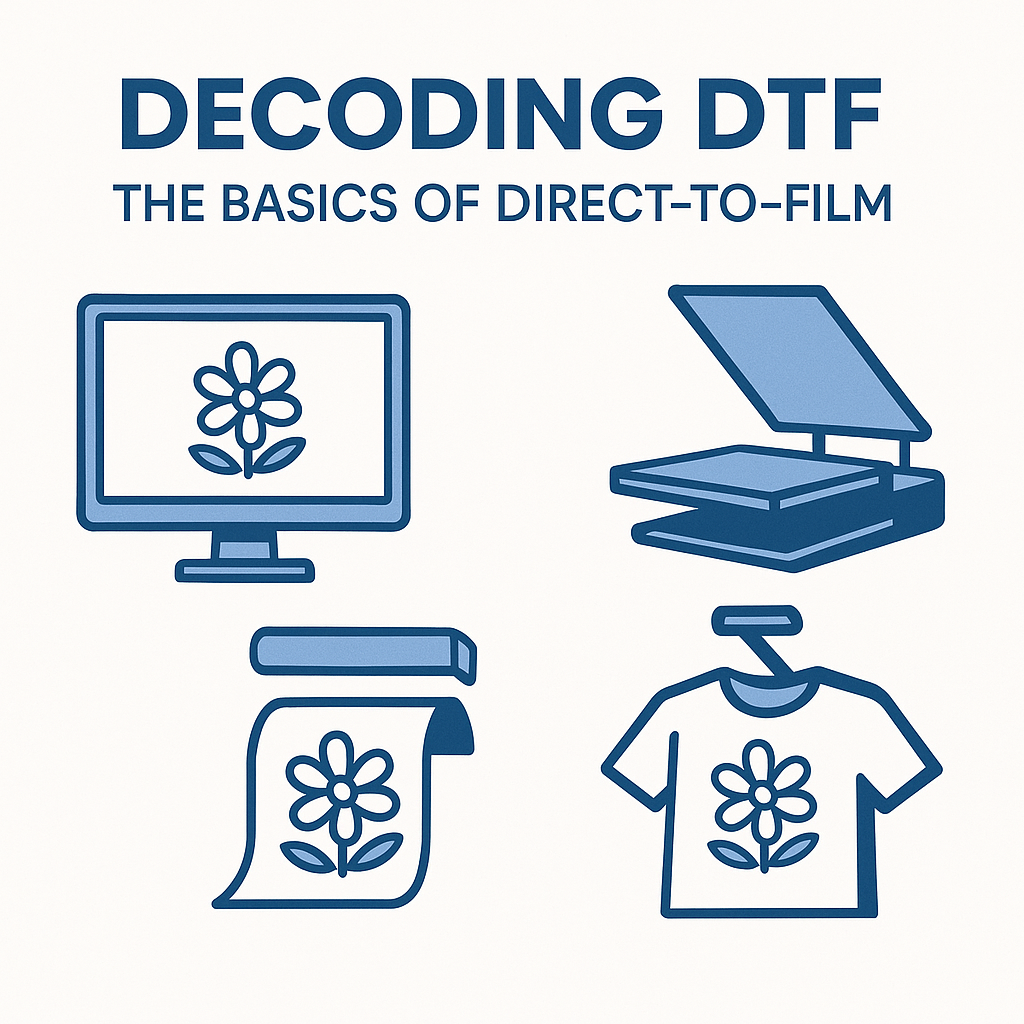
Decoding DTF: The Basics of Direct-to-Film
Direct-to-Film, or DTF, is a modern apparel decoration method where a design is printed onto a special piece of polyethylene terephthalate (PET) film. This printed film is then coated with a powdered adhesive, cured with heat, and finally transferred onto a garment using a heat press.
Unlike other methods like screen printing or direct-to-garment (DTG), the design isn't applied directly to the fabric. Instead, the entire graphic is prepared on the film first, creating a ready-to-press transfer. This separation is what gives DTF its incredible versatility, allowing it to adhere to cotton, polyester, blends, nylon, and more with stunning results. It’s an ideal solution for producing full-color, intricate designs without the complex setup of traditional methods.
The DTF Process: A Step-by-Step Breakdown
The magic of DTF lies in a precise, five-step workflow. While it may sound technical, the process is straightforward, especially when you order ready-to-press transfers from a professional service like Southeast Prints. We handle the first four steps, so all you have to do is the final press.
Step 1: Design and File Preparation
It all starts with your artwork. For the best results, your design should be created as a high-resolution digital file. The industry standard is a PNG file with a transparent background, saved at 300 DPI (dots per inch). High resolution is critical to ensure your final print is sharp and clear, not pixelated or blurry. Using a transparent background means that only your design will be printed, without any unwanted white boxes around it. You can find more details on our file requirements on the FAQ page.
Step 2: Printing onto PET Film
Once your file is ready, it's loaded into a specialized DTF printer. This machine is engineered to print onto rolls or sheets of PET film. The printing process uses a specific set of five water-based inks: Cyan, Magenta, Yellow, Black (CMYK), and White.
First, the printer lays down the CMYK colors to create your design. Then, it prints a layer of white ink directly on top of the colors. This white underbase is crucial for two reasons:
- It ensures your design’s colors appear bright and vibrant, even on dark-colored garments.
- It serves as the foundation to which the adhesive powder will stick.
Step 3: Adhesive Powder Application
Immediately after printing, while the ink is still wet, the PET film moves through a "powdering" station. Here, a fine, hot-melt adhesive powder is evenly coated over the entire design. The powder sticks only to the wet ink and is then shaken off the unprinted, clear areas of the film. This adhesive is what will eventually bond your design to the fabric fibers during the heat press stage.
Step 4: Curing the Transfer
The powdered film is then passed through a curing oven. This machine uses controlled heat (typically around 250°F) to melt the adhesive powder and fuse it with the ink layer. This step transforms the powdery coating into a smooth, even, and slightly rubbery sheet of adhesive on the back of your design. The transfer is now fully prepared, stable, and ready for application. It can be stored for months or pressed immediately.
Step 5: Heat Pressing onto the Garment
This is the final step where you apply the transfer to your product. A commercial heat press is essential for this part, as it provides the even heat and consistent pressure needed for a permanent bond.
The application process is simple:
- Pre-press the garment: Place your shirt or item on the heat press for 3-5 seconds to remove any moisture and wrinkles.
- Position the transfer: Lay the cured DTF transfer on the garment with the ink side down.
- Press: Following the recommended settings—at Southeast Prints, we advise 280°F for 10 seconds with medium to heavy pressure.
- Peel: You can peel the PET film away either hot (immediately) or cold (after it has cooled down), depending on the film type and your preference.
- Final Press: To seal the deal, you perform a second press for about 6 seconds, using a sheet of Teflon or butcher paper to protect the design. This final press locks the transfer into the fabric, improves durability, and gives it a professional, softer finish.
You can always find our up-to-date press instructions on our FAQ page.
Why Choose DTF Transfers?
Now that you understand the process, it’s easy to see why so many creators are choosing DTF. For an even deeper dive, check out our Q&A blog post on common DTF questions.
Key benefits include:
- Versatility: Works on a vast range of fabrics and colors.
- Vibrancy: Produces brilliant, full-color designs, including gradients and photos.
- Durability: When applied correctly, prints are stretchable and can withstand dozens of washes.
- Efficiency: Perfect for single orders or large batches, especially when using gang sheets to maximize value.
The DTF process offers a powerful and accessible way to create high-quality custom apparel. While the printing and curing steps require specialized equipment, you can get started today without any of the investment or hassle. Let us handle the technical work so you can focus on designing and growing your business.
With our industry-leading 24-hour turnaround time and same-day shipping for orders placed by 1 PM EST, you get flawless, ready-to-press transfers delivered right to your door, fast.
- Ready to create an efficient layout? Try our Online Gang Sheet Builder.
- Have your artwork finalized? Upload a Premade Gang Sheet and let us do the printing.